
So, I finished drybrushing those tiles that are the last piece on my checklist to be able to play the first Rangers of Shadow Deep scenario!
Mystery additional structureTreesCartWellWoodpileCrates and barrelsa playing surface!Treasure tokens
Here’s one in situ with some of the other finished pieces:

So, how I made them! Plans started earlier in the year, during one of our many lockdowns, when I asked my wife to grab me a sample of some wallpaper that looked like scale cobblestones. And she furnished me with this:

Flicking through the rulebook, I saw that I’d need to be able to make a variety of different sized playing areas. I’d grabbed a dust sheet with the intention to dye it grey to use as a playing area, but it turned out to be plasticky rather than material like I’d imagined so I needed to come up with another plan. At which point my eye alighted on a pack of floor tiles in Poundland…

I left some of the foot square tiles whole, but cut some in half and quarters (until I had 9 12” square tiles, 6 6 x 12”, and 4 6” square, which would allow me to make a variety of different sized boards, including the three 18” square boards needed for Tor Varden). The adhesive tiles were paper backed, so I started peeling them off:
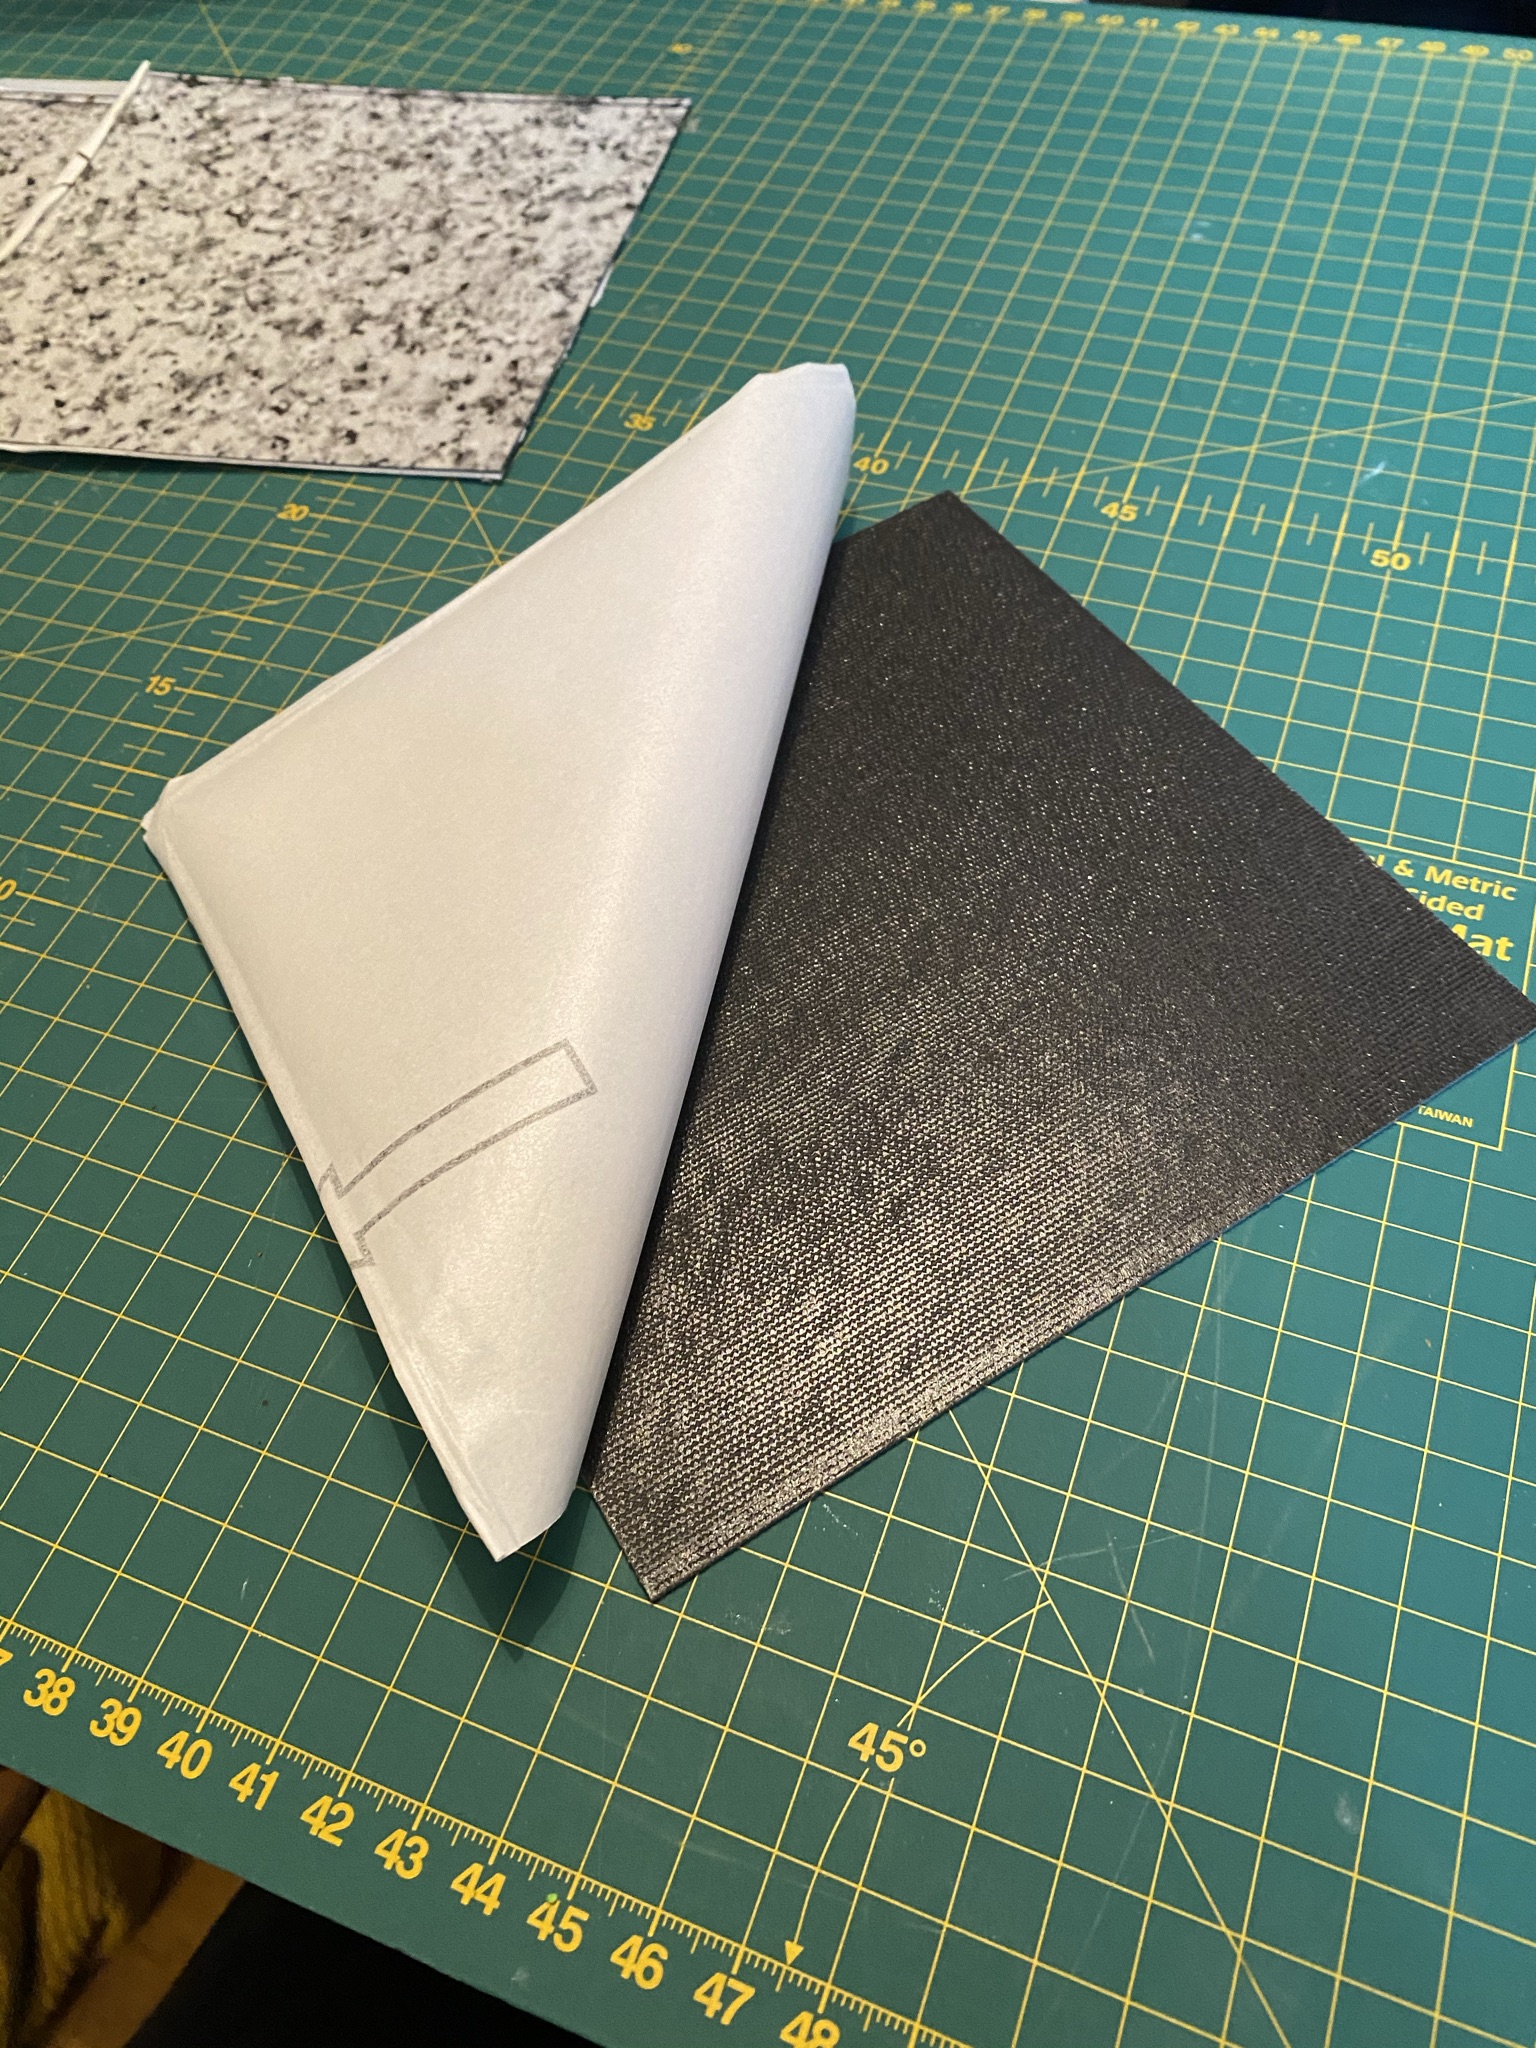
Thinking that it would be better grip having a rubber bottom rather than paper. Experiments with removing the adhesive with WD40, sanding, and prayer largely just made a mess…

So I decided to stick each tile to some newspaper and then trim the edges off, before applying some masking tape to each edge to try and give it a bit more ‘tooth’ to stop it sliding around on the table. In hindsight, I probably could have achieved much the same effect just slapping some tape onto the original backing paper, but at least this way there’s less chance of it peeling off and sticking my terrain tile to the dining room table and having to explain that to my wife…

Then, it was a case of decorating and texturing the tiles! I ripped, tore and cut suitably ruinous looking shapes out of my textured wallpaper

And stuck them willy-nilly onto some of the tiles
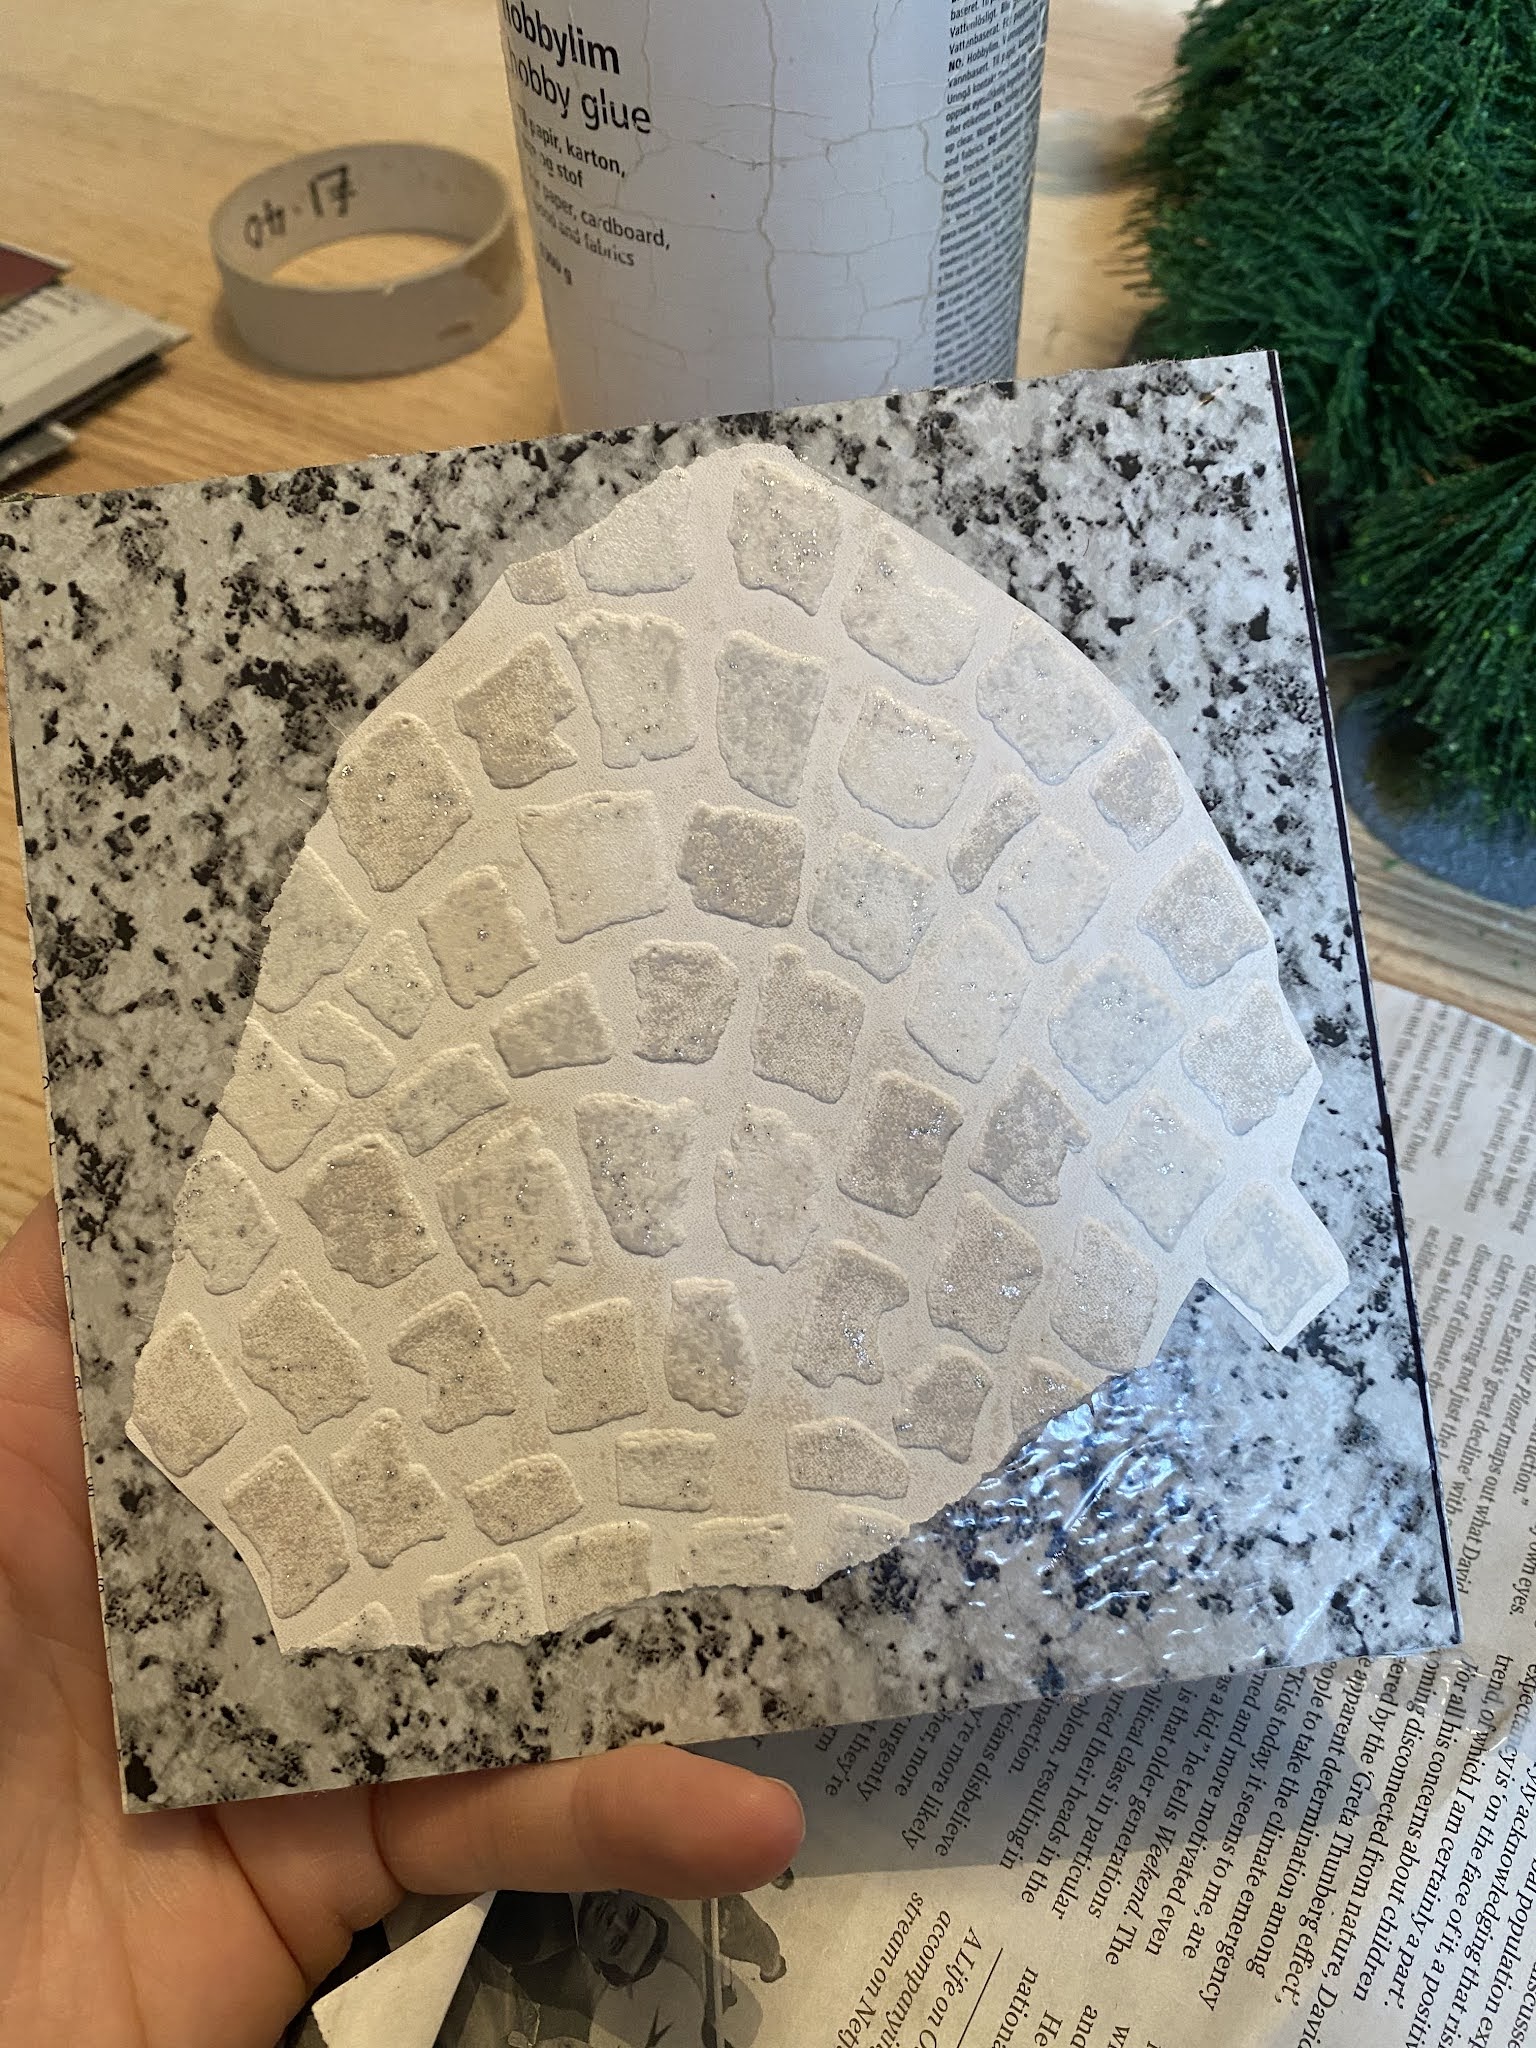
Not worrying too much about where they went, as they’d be slightly buried by textured paint, hopefully making them look like partially submerged areas of street in the rubble. I left enough tiles blank to be able to make a sizeable enough playing area for the ‘outside’ scenarios in the initial Rangers of Shadow Deep campaigns (although admittedly a little bit of paving in the middle of the woods surely just adds to the mysterious feel of the area… or could be covered with a tree)


At this point I also discovered that I had a plastic crate that was the perfect size to store the tiles in a stack, which was very pleasing:

Then, one sunny day (back in March!) I set about giving everything a liberal dousing of grey spray

Yes, there’s still a grey line in my garden where I overshot somewhat, that’ll wash off when it rains right?

Then in June (because opportunities for big project stuff rather than a sneaky hour here and there painting a miniature are rare when you have two children, work and whatnot) everything got doused in a brown wash:

Some things are a lot browner than others, due to variations in the mix when making up more as it inevitably didn’t go as far as I’d expected. The first batch had too much washing up liquid (which you add to break the surface tension), and so was bubbling up and settling weirdly when I brushed it on; the next batch I added barely any and it just didn’t spread out right. So, I bodied my way through - trial and error, the bread and butter of the wargamer!


The first two shades of grey admittedly didn’t really look like much had changed when applying them, but when it came to the cream the magic really happens:

I was initially going to skip the cream step, having read something where someone said that they tended to paint their boards darker than their miniature bases in order to make them stand out more, but I’m glad I didn’t in the end as they would have looked a little bland and flat otherwise!


I think I might have gone a bit overboard with the final pass, and they’ve come out a little paler and chalkier than I had initially envisioned, but for some cheap and cheerful difficult terrain I’m not fussed enough to go back and repaint it, truth be told. I guarantee that at least one will see use in Frostgrave, with a treasure token at its centre, because it amuses me no end to imagine a wizard seeing a pair of boots in the middle of a crater and sending a Thug off to go fetch it rather than picking it up themselves lest it still be a bit explodey…
And here it all is again in the perfect sized box, but finished this time:

On the non-task-completing side of things, it was my birthday on Monday, which came with a hit to the Tally:

The Reaper Fungal Queen because it’s lovely, and also this Oglaf strip:

These bring the Tally to:
19 vs 19 = +0
Still in the black, just!
I also got a paint shaker, having seen a multitude of videos where people espouse the virtues of them for salvaging old paints (of which I have many). My first attempt was on a pot of Liberator Gold which is so separated it’s just orange paint now… the initial shakings just smoothed out the orange with the assistance of the glass bead I’d popped in, so my wife suggested scraping the metallic pigment out of the bottom of the pot where it had seemingly settled and set, and whilst further shakings did make some strides towards unifying the paint it still isn’t what I’d call useable. This might not have been a fair test though, as that pot is probably beyond salvaging…


So, what’s next? Playing a game of Rangers of Shadow Deep! Although I should probably paint some miniatures too, as I treated myself with some birthday money to a copy of the updated Rangers book, and added some miniatures on to the order to get free shipping, so I’ll be back in the red on the Tally sooner rather than later!
Great looking gaming area you've achieved, and utilising readily available items. Hope you had a great Birthday
ReplyDeleteExcellent looking terrain, and thanks for taking the time to do the step-by-step post!
ReplyDelete