
When I woke up this morning though, I fancied something a bit different. I bought some Discworld miniatures a couple weeks back (Rincewind and the Luggage), and thought I'd make some cobble base inserts for them.
To start with, I gathered my materials:

A foam pizza tray, and a variety of cutting and drawing implements (not pictures is sandpaper and a pair of tweezers, which I didn't realise I'd need at this point).
Using a sharpie, I coloured in the lip of each base, and pressed it against the pizza tray:

Which I then cut off as a smaller piece, so I wouldn't look like an escaped lunatic when I went outside with it (more on this later):

Then comes the fun part - the stomping, to give it a nice stony texture (hopefully the animated gif works, if not, imagine me stomping):
[Edit: apparently if you click on it it opens in a new window and works...]

This didn't give as much texture as I wanted, so I pressed it up against a variety of bricks and gave it a brisk rub on the back to pick up even more texture. At which point one of my neighbours came out to take his rubbish out, to find me furiously rubbing on a bit of foam pressed against the wall, which my young lady thought was hilarious...
Totally worth it though, as my foam was now nice and stony:

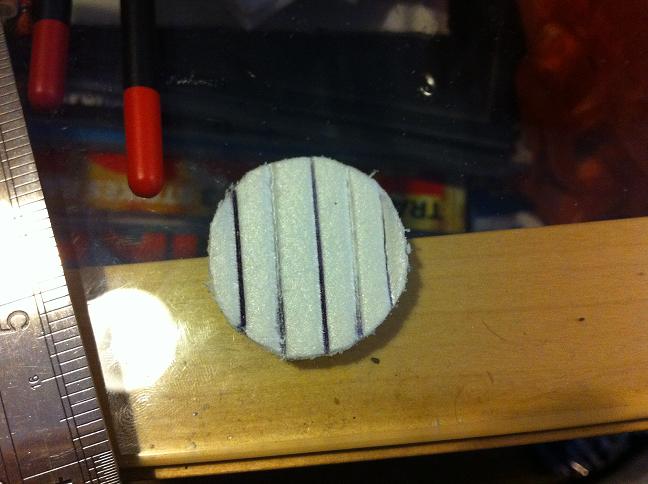
And we're ready to move onto the next step. To make it easier to work with, I cut each circle out at this point:

and then tidied them up with some gentle sanding. Then comes the scribing. Using a Doctor Who pen (that has a floating Dalek in it) and a metal ruler, I scribed in the first set of parallel lines:
Then freehanded in the connecting lines to give it a nice, uneven cobble pattern:

Once I'd finished all the penwork, I went back over it with the point of a pair of tweezers to make sure all the lines were scribed deeply enough, and then added a few cracks and gouges to some of the bricks. Once that was all done, they get glued into the bases:

They'll get coated in a layer of thinned PVA to toughen them up (and so they survive a spray undercoat), and then once the miniatures are on, I'll add a little sand to grubby them up a bit. But until then, they're done!
cool! I'm only sorry I didn't get to see the Dr. Who pen :)
ReplyDeleteNice. I'm interested to see how they turn out.
ReplyDeletePretty good idea mate!
ReplyDelete