Tuesday, 27 March 2012

Arabian (k)niiiiiiiiiiights...

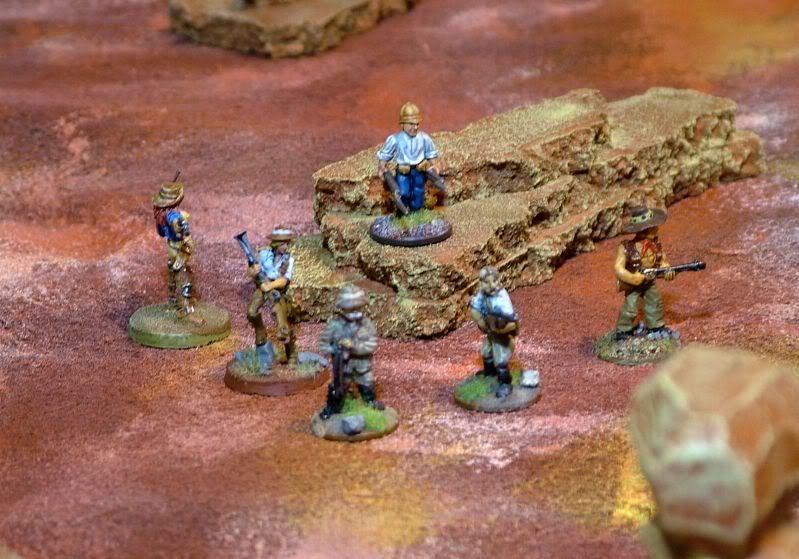
...like Arabian daaaaays.... More often than not, they're hotter than hot, in a lot of gooood waaaaaaays! Ah Aladdin... except imagine Aladdin joined a cult and decided to menace Conan:


Not only for Conan, they'll also make a nice Song of Blades & Heroes warband, or stand-in for Dungeons and Dragons. We have the Magister, flanked by a Hero and Champion looking pair:


(Crikey, photos are even worse than usual today, that's what I get for not finishing in time to use natural light). When I first pulled the central chap out of his ebay package, I thought about using him as some sort of town official, but it didn't take long before he'd been recast in my mind as some sort of evil magister. I mean, look how fancy his coat is!


Supporting them (and by supporting, I mean dying in droves under the onslaught of even the lowliest Hero type) we have a couple of henchmen:


I don't know why that guy even bothers with that shield, he's not even wearing a shirt!

Unsure of whether they're goodies or baddies, we have a pair of warrior princess types:


(pretend these photos are brighter)


When they're not part of a sinister cult, they can stand in for various character classes too.

Last but not least, we have the minis that shape the theme of the warband, dependant on their inclusion:


Zombies! With these, we have the entourage of an evil necromancer, without them, they're the bodyguards of an accountant...

Every miniature features a red sash or scarf, to tie them all together, but also to link them to the Snakeman I painted a while back, huzzah!

Actually finishing some miniatures brings the tally to:

27 vs 67 = -40 As soon as I can find a shade of pink I like for finishing off needlers, I'll have another dozen finished miniatures, but that still means I'll need another 28 to get back to zero - and Salute's in three weeks...

Saturday, 24 March 2012

New gw paints have new pots!

With a new hinge system that holds the lid open! Although they're not going on sale for another fortnight, so we'll see then if that prevents the usual spillage issues... Also, the lids on the shades and glazes can be a bit of a bugger to open, but that could just be me lacking manual dexterity...

[update] not all the paints will have the new pots, bases (what used to be foundation) and layers (what used to be ... well, paint) will still have the old style pot 'as you shouldn't need to leave them open'...

Other points of interest: the new 'base' paints are thinner than the old foundation paints, which should mean they last a bit longer before turning into a gloopy unuseable mess, and the new 'drybrush' paints aren't really paint at all, more like a mousse, which will take some getting used to...

Tuesday, 20 March 2012

The single greatest comic panel ever made...

...is this, from issue 16 of Warlord of Mars, one of the many John Carter comics:


Even in context, it's hilarious (although for different reasons).
So, I've still not finished any miniatures, because I realised I had this to deal with:


I hadn't got round to reading any comics yet this year (most of these piles have 3-5 comics in). And yes, I do get six seperate Barsoom series. Sue me, I likes me some Barsoom.

Despite not having any proper progress to show, the postman brought me some more goodies:


Crusader Early war brits, Artizan British command and the VBCW sourcebook is the start of my foray into alternate local history, as well as some Renedra grave stones, because graves can be used for pretty much any setting...

And also this cheeky Artizan chappy, another goody bought from Mr Marx. He'll make a rather spiffing renegade Threashold Agent for Strange Aeons (when I eventually get round to painting him, that is...)
Which brings the tally to:

12 vs 67 = -55

Finishing the twenty-seven almost painted miniatures on the painting table at the minute would only claw me half the way back to zero...

Thursday, 15 March 2012

Quest for cork continued, and poundland goodies...

Alas, there is no cork, and the samples that I had from various online retailers weren't what I was after (turns out it's hard to find unlaminated natural cork)... I even nipped to our local art shop, where I'd previously gotten sheet cork to make a comic shop in the style of Matakishi, but they only had rolls of super-thin cork...

Onto happier times though, after seeing ilikepaintinglead's blog and one of the regulars at work bringing some in, I nipped into poundland and picked up some of these:


Yes, I got distracted and made a spaceship while I was working out how many tiles were useable for making terrain. Annoyingly, out of the two bags I bought, there was only enough plain brick tiles to make four bits of wall (assuming I make them the same as in ilikepaintinglead's blog, as mentioned earlier), but enough bits with 'OK' in the middle of them to make a tower of babel-esque proportions... I may have to nip and get another bag or two before I start in with the cutting and glueing...

Also, the tally has changed (which is good, as I know I've got a parcel in the post):

12 vs 38 = -26 (-3 Tomb Kings minis given to Uncle Johnny)

Sunday, 4 March 2012

Nothing much and the quest for cork...


Alas, I've still not finished painting anything. I was hoping to combine an up and a down to the tally with this post, but no dice. These 14 apes for Rise of the Planet of the Apes sink the tally even further to:

12 vs 41 = -29

In other news, I've been on a quest for cork recently after mattblackgod posted up pics of some rocky mars terrain over on the Lead Adventure Forum the other day:


Unfortunately, there seems to be a cork shortage on. There's a shop in town that has cork pan coasters at 2 for a fiver, which is a little more than I'm willing to pay for around a square foot of cork. Ikea has the same thing at 3 for £2, but they aren't something they'll deliver, and the nearest Ikea is a little out of the way to nip in for some. I even hit B&Q today, only to be told that they 'don't do cork tiles any more', which is a bit of a bugger...

Now comes the random ramble: I can't stop reading VBCW blogs! The only thing that's stopped me from buying a load more miniatures is not really knowing where to start... That, and I've not got access to the magazines that had the LOTOW rules adaptation in (as they're currently in a box in storage) and I can't remember which issue (or which magazine, truth be told) they're in to try and find a pdf... I was originally thinking about dipping my toe into the water by converting and painting a miniature to represent a local figure of the time (like the Lady Mayoress), but at the same time Crusader Miniatures are doing WWII miniatures at a bundle price...

Monday, 20 February 2012

Spartans Assemble!

So, rather than cracking on and starting to paint my converted spartans in fetching shades of red and blue, I thought I should probably convert some more to make enough for a four-player game. I'll use Master Chief for one player, but that meant I still needed seven more minis...

To start with, pistols:


I had to convert two, since there isn't already a Master Chief fig with a pair of pistols (although I'll use the Master Chief I'd previously converted for him, as that way it's only the M.C. figs that are stood on various large chunks of scenery...)

Whilst converting these I had a sudden thought: what if, rather than cutting through arms, wrists etc to convert them, I just wrenched the whole arm out? Turns out they're held in place with a handy Tetris-piece shaped plug (which you can sort of see here):


Which you'd think would make arm swapping fairly straightforward, no? Turns out they're positioned somewhat differently in different figures, resulting in the following:


All hail surrender Spartan! He amused me briefly, but a little bit of cutting, some liquid green stuff and a dab of superglue later, and he became the Spartan you saw in the first picture.

I won't bore you with individual shots of each of the other five:


From L-R:
Battle Rifle (that was originally going to be on the sniper model, but I just couldn't get the Sniper Rifle to sit right so they got swapped);
Shotgun (using a Brute Shot body so it looks like he's rocking back in response to some suddenly appearing threat);
Sniper Rifle (I think this one's the body of a carbine wielder on a random pair of legs from my halo bits box);
Needlers (legs from the leaping carbine figure, looks a bit like he's doing ballet though...);
Plasma Rifle (I used the energy sword body with an arm swap and some hot water repositioning to make it look like the rifle had just overheated and burned his fingers, because that's how I imagine it happening whenever I play the Xbox game...)

So with these done, that brings us to two dozen:


Bammo, I'll base the rest once this post is up and then they'll be ready for undercoating (which probably won't be until the weekend).

Before all of this happened though, I decided to base the discworld miniatures I had on the cobblestone bases I'd made:


I added a few patches of rough sand to mucky it up a little and voila, done! Well, not entirely. Note the green stuff under Rincewind's boots, where I made an epic fuck-up. After spending so much time coating those bases with PVA to protect them from the harshness of aerosoals and chemicals, in a moment of unthinking ridiculousness I pinned Rincewind to his base. Yep, I drilled through the protective coating into the poor, defenseless foam and poured in superglue. It promptly started dissolving, prompting a bout of swearing and and a rush to pour enough green stuff into the recently created holes to try and plug them up... I think I'm going to brush undercoat the bases before I spray them though, just in case anything else goes wrong...

Sunday, 12 February 2012

Cobblestone Bases

Last night, I got some more painting done, and was determined that today I'd finish some miniatures.

When I woke up this morning though, I fancied something a bit different. I bought some Discworld miniatures a couple weeks back (Rincewind and the Luggage), and thought I'd make some cobble base inserts for them.

To start with, I gathered my materials:


A foam pizza tray, and a variety of cutting and drawing implements (not pictures is sandpaper and a pair of tweezers, which I didn't realise I'd need at this point).

Using a sharpie, I coloured in the lip of each base, and pressed it against the pizza tray:


Which I then cut off as a smaller piece, so I wouldn't look like an escaped lunatic when I went outside with it (more on this later):


Then comes the fun part - the stomping, to give it a nice stony texture (hopefully the animated gif works, if not, imagine me stomping):

[Edit: apparently if you click on it it opens in a new window and works...]


This didn't give as much texture as I wanted, so I pressed it up against a variety of bricks and gave it a brisk rub on the back to pick up even more texture. At which point one of my neighbours came out to take his rubbish out, to find me furiously rubbing on a bit of foam pressed against the wall, which my young lady thought was hilarious...

Totally worth it though, as my foam was now nice and stony:


And we're ready to move onto the next step. To make it easier to work with, I cut each circle out at this point:


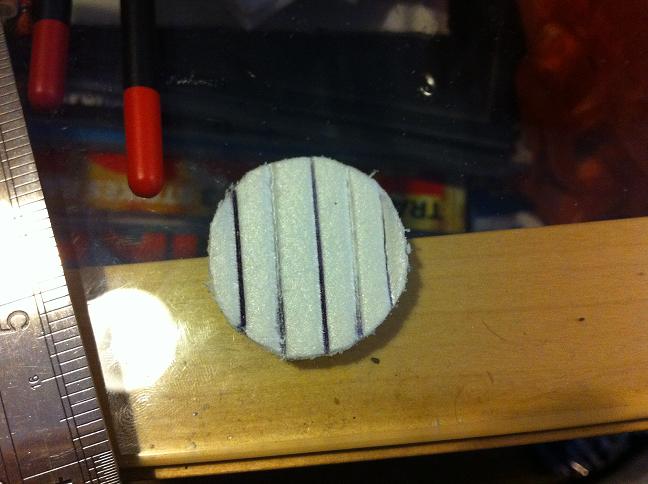
and then tidied them up with some gentle sanding. Then comes the scribing. Using a Doctor Who pen (that has a floating Dalek in it) and a metal ruler, I scribed in the first set of parallel lines:


Then freehanded in the connecting lines to give it a nice, uneven cobble pattern:


Once I'd finished all the penwork, I went back over it with the point of a pair of tweezers to make sure all the lines were scribed deeply enough, and then added a few cracks and gouges to some of the bricks. Once that was all done, they get glued into the bases:


They'll get coated in a layer of thinned PVA to toughen them up (and so they survive a spray undercoat), and then once the miniatures are on, I'll add a little sand to grubby them up a bit. But until then, they're done!