Having previously acquired my cork pinboard to use as a base (available to order
(this would later turn out to be nowhere near enough to cover the whole board)
I also set out the other essentials - beer and glue:
Diluting the PVA to a consistency that it could be easily spread with a large paintbrush, I masked off the frame and started slapping it on:
Working in sections, I'd coat the board in glue, then pour on some of my tea/sand mix:
Until I'd covered the entire board:
Despite giving it a fairly good coat and patting it down as I went to make sure it was well attached, after leaving the board overnight I went to tip off the excess loose material, and rather more than I expected came off:
So I went back and glued some more down again, left it to dry, tipped it off, glued it down again, tipped it off... One issue I found with using tea was that when I'd reapply glue, it would soak it up like a sponge and get very moist, and start to lift if I was too rough with the paintbrush... In the hopes of getting the amount of material to stick to the board that I actually applied, I set about trying out some solutions to seal it down. Attempt 1: Spray Mount:
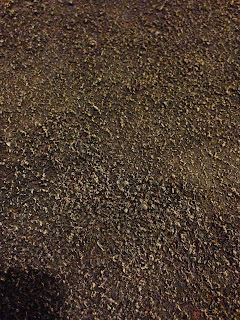
Pro: readily available in the house. Con: Didn't really do much in the way of sealing the board. Pro: Fun to use. Con: left me with a very sticky board for a while... So, I went for the traditional, tried and tested method of sealing - a good coat of watered-down PVA. As already mentioned though, getting the tea and sand mix too wet led to it lifting, which required careful tamping down (and lead to problems later on, but we'll get to that...). Once that was all done, I was left with one bumpy board:
Which was when it was time to start painting. At night, lit only by a headlamp worn by my wife:
As is the case with all my scenery, the basecoat comes from a poundshop can of grey car primer:
Which is then touched up with watered down Astronomicon Grey:
Next, comes a hearty wash of watered-down Vallejo Smoke, to grubby it up and give a little bit of depth:
You may remember earlier I mentioned the problems I'd had with the tea getting moist and lifting? So yeah, where I thought I'd previously completely sealed the board, this step proved that assumption to in fact be incorrect, as some of the material began to lift, leading to further touch ups and another coat of watered-down PVA:
Which is as far as I'd gotten until yesterday. Mostly complete, with a few mishaps along the way, but just some finishing to do, which was completed in the usual fashion, with a drybrush of Codex Grey, Fortress Grey and then Bleached Bone:
Which, as you can see in this staged shot with a couple of miniatures ad some scatter terrain, will do me nicely:
Although I will admit that after taking that last picture I did go back and give the board another coat of Bleached Bone to make it a little lighter so that it would better match the bases on my terrain and miniatures:
In hindsight, I should have taken extra extra care to ensure that everything was sealed properly, which would have saved a few headaches along the way. I should also potentially have re-started the entire painting process after I had to re-seal the board following the application of Vallejo Smoke, but honestly at that point I was just keen to get the whole thing finished (after it having lain dormant for a little while) and so cracked on with the drybrushing...


I wonder if a spray bottle of watered-down PVA glue would've worked...
ReplyDeleteI did plan to, but unfortunately since I'd last used it a seemingly vital part of the inside tube of my spray bottle fell off into the glue and I couldn't fix it...
DeleteThat certainly worked, great result!
ReplyDelete