Sunday, 28 January 2018

Rubble and Scatter Terrain - Part 3 - Finished!

Christmas passed, I knocked off a few miniatures here and there, and then decided to get down to business and finish this terrain (as it had been sat forlornly on a box lid in the corner of the basement ever since getting undercoated).

I started out by basecoating the barrels red, a step so mundane that I apparently didn't even think to take a picture of it, and then decided that the barrels needed some markings. Having a dig through my supplies, I settled on using some of the old Imperial Guard numeral transfers:


However to make them look less recognisable (and give a wider variety of numbers) I decided to cut them down into two digit numbers:


And so on they went (in this example, onto a set of barrels that I'd already started weathering before I decided that I was going to add transfers):


Using these probably quintuples the amount of waterslide transfers that I've ever used? Unfortunately, when I went to paint around the edges of the transfers to blend them in, I discovered that they mostly weren't actually very well stuck down. Whether this was due to the age of the transfers, me not being patient enough when applying, or some other factor, I don't know, but this needed fixing!

I remembered Uncle Johnny telling me a while ago about the miracle of Micro sol and set for applying transfers; wondering whether it would work to help set the already applied transfers, he was kind enough to bring some round when he brought presents round after Christmas.


I painted some on with an old brush, and let it set for a while before dabbing away the excess with a clean piece of kitchen towel, before going back and reapplying where necessary, and it seems to have done the trick. Sometimes I got a bit carried away and the transfer started floating away, but I was able to nudge them back into position with the brush and then dab them down to affix them.

Health & Safety reminder - remember to open a window when working with things like this. I did not, and so was musing about the fact that Micro Set smells like the most delicious salt and vinegar crisps you could possibly imagine, before realising that that might not actually be the case, I'd just been inhaling the fumes for too long.

Then it was just a case of weathering (using blister sponge and some grotty brushes), washing everything with Vallejo Smoke, and then drybrushing the rubble with the same paints that I use for painting bases.


Note to self - seal cork better, or drybrush gentler. An additional step involved spending an amount of time going back over each piece fixing any spots where the bare cork had been exposed by my overzealous brushing...

And lo, the finished barrels:


I tried to make the bucket look like it had some dirty water in the bottom. I started out by dripping in a little PVA, mixed with some Typhus Corrosion (as I had it out already to add some streaks to some of the metal painted pieces). For the effect that I had in my head, Vallejo Smoke might have been a better choice, although as it took the PVA two days to dry, by which point there was almost nothing left in the bucket (bar a tide mark left by the Typhus Corrorsion) I don't know how much difference that would have made! Rather than continuing like this (which could have ended up taking weeks to get the bucket to look half-full) I settled for a shallower fill on the bucket, pouring in a little 'Ardcoat to make it look shiny and wet.

Here are the finished rubble pieces:


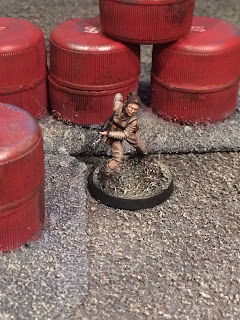
And now here are a number of posed pictures with various miniatures testing how multi-use this terrain set is...


Nothing off of the Tally for finishing these, but I do get to strike another item on the Challenge list:


2018 Challenge:
  • Finish something years old
  • Finish something pre-blog old
  • Finish a piece of terrain
  • Paint something from the stripping pot
  • Prep all of the monkeys in the monkey box
  • Build a wargames board
  • Paint all of the miniatures in a boxed game
  • Open Star Wars Imperial Assault and paint all the miniatures from it
  • Paint all the miniatures needed to replace the tokens in the Imperial Assault Core Game
  •  Paint a complete box of miniatures (either a full regiment or starter)
  •  Finish a complete skirmish force for a project (at least 16 miniatures, unless it's for a much smaller scale game like Batman)
  • Repaint something (either a miniature that I have previously painted, or one that was received painted)
  • Convert a miniature and show WIP pics
  • Finish a member of the Nextwave team
  • Average at least a miniature a week by the end of the year (so, paint 52 miniatures)
  • End the year with the Tally in the positive!

What next? I've got the majority of the scenery from the recent Necromunda rerelease cleaned up on my desk and awaiting spraying; I could start some of those terrain pieces that I was tempted to now that I've finished these; I've even attached the Wildlings that were converted around the same time as this terrain was started to bases (although they might get pushed back until I can get some more female miniatures - there;s a rather nice Frostgrave Barbarian Tracker that I like the look of, as well as the recently announced female soldier sprue...); - most likely though, I'll pick at a few odd, unrelated miniatures from the queue, until I've made space for the Goliath and Escher gangs from the new Necromunda...

Friday, 26 January 2018

Experiments with Rubble Paste; Rubble and Scatter Terrain - Part 2

When we left off, it was now July (natural light in pictures, my word!), and we had a bunch of scenery on fairly sparse looking bases, so I decided to try and make some rubble paste. As with many things I attempt, I had a vague recollection of having seen a tutorial on Youtube at some point in the past, and so winged it based on what little (potentially not the important bits) that I could remember and hoped for the best.

One of the things I remembered from the video that I'd seen was that they used crushed eggshell to add some erratic not-just-sand shapes to the rubble, so I dutifully set about saving some. Warning - no matter how much I cleaned them, the plastic tub I was keeping them in was very, very stinky when I came to use them, so this isn't for the squeamish!

So, I cleaned them again. And again.


Then dug out the mixing bowl that has been used to make textured paint enough times that it is ruined for any other use:


And set about crushing the eggshell into irregularly sized pieces:


Then bulked up using a blend of sand, grit and cork pieces:


I then mixed it all up, with some PVA to bind it all. At this point it looked like the world's least appealing breakfast cereal:


I also added some plaster at this point, to bulk it up even further. In hindsight, I would probably reduce how much I added (or skip it entirely) as it softened some of the lumps and bumps, but not so much so that I felt compelled to rip it all of and start again!

Then I added some black paint, before adding some extra larger cork pieces for seasoning:


Then it was just a case of bodging it onto the bases using a coffee stirrer to jam it into all the nooks and crannies:


Repeat for each piece:


And here's how it looked once it had dried:


I was beginning to suspect that I had added too much filler to the mix, but figured that it looked alright here, and would hopefully drybrush nicely when it came to time to paint!

Then it was just a case of sanding the rest of the bases:


Here's everything drying post sand application:


At least a couple of those miniatures at the front have since been finished and posted, which makes a nice change from most of these old WIP pictures!

I then spray undercoated all of the terrain grey, as usual, and then that was about it for the next six months...

Tune in next time for what is hopefully the final stretch...

Wednesday, 24 January 2018

Rubble and Scatter Terrain - Part 1

So, I've almost completed some pieces of scatter scenery that have been sat half finished in the basement for way, way to long! Admittedly, the main reason I've been determined to get them finished is that I keep getting struck by inspiration for building various bits of scenery, but didn't want to just add to an existing queue of half-finished things, and so decided to finish them off before I'd let myself start anything new...

How long is way too long, you ask? The bulk of the content for this post (as there's so much, I'll probably split it into two or three posts) is from last June. You'll notice that I'm wearing shorts in some of the pictures:


So, way back last summer, a few of us had decided that we wanted to play Inquisimunda. Well, I say a few of us had decided, I was tempted to, and bugged other people in the hopes that they would too. Wanting to be a providing sort of host, I thought I should knock up some simple (and generic, so that it could be used for other projects rather than being limited to just 40k) scatter terrain.

My first idea was some pleasingly generic sci-fi barrels, made from soda caps, an idea I think I first saw done by Nathan Ironworker Miller over on the LAF that I mentally files away for later use. Handily, my wife drinks a bunch of Pepsi Max (it is apparently healthier than regular carbonated beverages), so it didn't take too long to accumulate a suitable number of bottle caps. A quick sand to flatten their bottoms (oo-err) and they were ready to be superglued together in pairs to make barrels:


Note the Inquisitorial Acolyte for scale, who has noticeably not appeared painted on the blog in the sevent months since this picture was taken. The majority of those clips are from poundland, by the way, and I recommend anyone thinking about building any terrain or scenery grab some rather than siting holding things together while they dry with your actual hands!

I scribbled some rough shapes in pencil on the board that I use for basing all of my terrain these days, and then cut them out, and bevelled the edges with a knife.


I then set about arranging the barrels on bases, and glued them down with PVA, as I figured this would have a little more 'give', being less likely to snap off than superglue if I were to drop them or be a little rough during painting (spoiler alert - at least one broke off during painting)


I also made a couple of other pieces that don't seem to feature in these pictures, but that you'll end up seeing later...

Pleased with these pieces, I decided to make some accompanying rubble / rough ground pieces, to slow movement and block line of sight. In hindsight, knowing how I am, I should potentially have done the two batches of terrain separately (as two manageable chunks rather than one big mega lump) in order to get them finished quicker, but who knows if that would really have been the case...

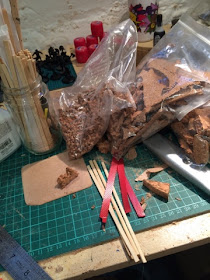
Thusly, I dug out my bags of differently sized pieces of cork (doesn't everyone file their cork by size?) and a few bits and bobs, and set about making some rubble bases.


A pipe here, a bit of scrap metal there, a broken piece of wood panelling that was inspired by the collapsed buildings in Fallout 4 where there's a whole floor collapsed into the room below but ended up looking more like someone had discarded a fence panel, and a hearty handful of bits of cork, and we have our basic base:


I also etched a brick pattern into some foam (the type that comes underneath a tasty chilled pizza from your local supermarket) to break up into fallen wall sections, to provide some different texture and visual interest:


Some pieces also got taller ruin sections, to provide more line of sight blocking, whereas other pieces had quite a low profile, intended to simply be rough ground that would force tactical movement decisions but otherwise not affect a firefight.


I then decided to go back and add a couple of 'character' pieces to each set;

Firstly, an objective-esque barrel (or simply one with a little more narrative than just 'stack of barrels') with the addition of some pieces from a Tamiya sprue:


And then taking a saw to the cogs from an old Hot Wheels toy (that is one of the projects that keeps catching my eye, but I'm determined to get these finished before I start anything else!) to make a large cog and rubble piece, even including a half-buried barrel to tie the two sets together...


And that, dear reader if you've made it this far, is where we pause. More to come in a future blog post though, don't you worry...

Friday, 19 January 2018

Belated Christmas, broken miniatures and... a Gundam?!

As an adult, Christmas can last the best part of a month as you catch up with people that you weren't able to exchange gifts with over the actual festive period. This was the case with Uncle Johnny (a name that he's only actually known as on the pages of this blog), although we weren't actually able to get all of our wives and children in the same place at the same time, so ended up with more of a 'flying visit with rapid fire exchange of gifts' in the end.

Thus I received this:


A figure case along with a very lovely Wight model that I have coveted for some time (although as ever, I've seen a rather nice Inquisitor conversion using this figure as a base, so I'm conflicted as to whether I should build him straight or chop him up for bits), which brings the Tally to:

4 vs 1 = +3

You'll also notice a couple of other shinies in the case, which weren't part of the present, but a couple of broken miniatures that John brought over for me (because he's just that nice - also, some Micro Sol and Set). I'm not counting them as miniatures for the Tally, but as bits for my bits box, and got to musing - I love broken miniatures.

When I were naught but a youth, I loved broken miniatures. I mean, I still do, but moreso then. Being young and poor, I would often buy lots of broken miniatures and assorted bits on eBay, and conversions would be fuelled by being forced to make something out of these disparate broken bits. These days, there are so many excellent plastic kits, and people making some quite frankly remarkable kitbashes, but there's still something to be said for rooting around your bits box and jury-rigging a finished miniature out of parts that might otherwise have been thrown away - doubly so if it's the result of someone else's abandoned conversion! Models with hands loped off, inexpertly removed heads, those were the stuff dreams were made of. Maybe I've just gotten lazy in my old age - tempted just to copy other people's conversions by ordering the bits I need, rather than actually exercising the old creative juices? There's an inquisitor conversion half-finished in a baggie in the basement that was inspired by trying to salvage a Commander Dante body that came into my possession missing his weapons and half of one arm, maybe I should dig it out and finish it off...

In other hobby related news, I've built the No Grade 1/144 Gundam Wing that I got for Christmas:


I'm not a big fan of the stickers (except for the eyes) so I'll probably order some Gundam Markers and go back over him at some point to finish him off. I've reached something of an impasse in the ruleset I was writing, so I probably need to order some more kits and try them out to see what the obvious things that I've missed are!

Sunday, 7 January 2018

Bird.....oh!

Managed to finish another half-painted miniature from the queue:


Originally a Dreamblade figure, he got lopped off of his base, rebased, undercoated, then abandoned until recently. No real plan for it, but what can I say, I see a weird bird monster with a very wormy tail wearing a cape made of flayed bloke and I'm on board:


Tee hee:


Perhaps the fact that it was destined to go into a box labelled 'generic fantasy' potentially never to see the light of day again had something to do with how long it took to get finished...

Here's a picture with some other large monstrous type from the last year to give an idea of scale:


Another line through something on the Challenge, as he was started so long ago that that's actually a GW branded base he's on, rather than the slimmer non-brand types that I prefer these days as modelled by the Bell Golem (although I have a feeling this rate of completion isn't going to be maintained):

2018 Challenge:
  • Finish something years old
  • Finish something pre-blog old
  • Finish a piece of terrain
  • Paint something from the stripping pot
  • Prep all of the monkeys in the monkey box
  • Build a wargames board
  • Paint all of the miniatures in a boxed game
  • Open Star Wars Imperial Assault and paint all the miniatures from it
  • Paint all the miniatures needed to replace the tokens in the Imperial Assault Core Game
  •  Paint a complete box of miniatures (either a full regiment or starter)
  •  Finish a complete skirmish force for a project (at least 16 miniatures, unless it's for a much smaller scale game like Batman)
  • Repaint something (either a miniature that I have previously painted, or one that was received painted)
  • Convert a miniature and show WIP pics
  • Finish a member of the Nextwave team
  • Average at least a miniature a week by the end of the year (so, paint 52 miniatures)
  • End the year with the Tally in the positive!

Hmm, posting the big old list every time something gets crossed off is a little unwieldy. Maybe next year, I'll get 24 things and make one of those bingo cards that other, more popular bloggers seem to be using...

This was the last miniature out on my desk after a mini tidy, so I decided to go whole hog and clear the decks for the next batch of hobby projects:


Mmm, all that space for doing things.

Let's see how long that lasts...

Tally:

4 vs 0 = +4

Saturday, 6 January 2018

Drums! Drums! Wait, wrong Animal...

Another deep cut from the depths of the painting queue - Animal from the Schaeffer's Last Chancers set:


I picked him up on eBay a while ago to use as an Inquisitorial henchman, because I think he is one of the most characterful miniatures that GW has ever released!


He's a little bit of a rough sculpt (I tried to paint the eyes, honestly I did), but no less charming for it. You might struggle to see it given how awful my photography is tonight, but I've tried to give a heat damaged effect to the melta gun muzzle with purple and blue washes, followed by a drybrush of black at the very tip to make it look a little sooty. The rest of his gear got some weathering too, as I figure he's pretty much just chucked in a box between missions, and rattles around something fierce, rather than sitting polishing his shackles in a sumptuous bedroom somewhere.


He has an Auspex too (which I forgot to get a picture of), which seems like an odd piece of equipment to assign to an almost feral convict.

As he's been in the painting queue for so long, I get to cross another thing from the Challenge!

2018 Challenge:
  • Finish something years old
  • Finish something pre-blog old
  • Finish a piece of terrain
  • Paint something from the stripping pot
  • Prep all of the monkeys in the monkey box
  • Build a wargames board
  • Paint all of the miniatures in a boxed game
  • Open Star Wars Imperial Assault and paint all the miniatures from it
  • Paint all the miniatures needed to replace the tokens in the Imperial Assault Core Game
  •  Paint a complete box of miniatures (either a full regiment or starter)
  •  Finish a complete skirmish force for a project (at least 16 miniatures, unless it's for a much smaller scale game like Batman)
  • Repaint something (either a miniature that I have previously painted, or one that was received painted)
  • Convert a miniature and show WIP pics
  • Finish a member of the Nextwave team
  • Average at least a miniature a week by the end of the year (so, paint 52 miniatures)
  • End the year with the Tally in the positive!

Yes, I basecoated him, and then largely kept him in a variety of boxes for 8 years or so. Done now, so to steal a phrase from the Inquisitor rulebook 'The ends justify the means'.


Tally

3 vs 0 = +3

Thursday, 4 January 2018

Raider from the stripping pot

Here's another one from the painting queue:


An em4/Grenadier Future Wars savage from the depths of my stripping pot, for use in the Fallout project as a savage Raider, which lets me strike off the first item from this years challenge list:

2018 Challenge:
  • Finish something years old
  • Finish something pre-blog old
  • Finish a piece of terrain
  • Paint something from the stripping pot
  • Prep all of the monkeys in the monkey box
  • Build a wargames board
  • Paint all of the miniatures in a boxed game
  • Open Star Wars Imperial Assault and paint all the miniatures from it
  • Paint all the miniatures needed to replace the tokens in the Imperial Assault Core Game
  •  Paint a complete box of miniatures (either a full regiment or starter)
  •  Finish a complete skirmish force for a project (at least 16 miniatures, unless it's for a much smaller scale game like Batman)
  • Repaint something (either a miniature that I have previously painted, or one that was received painted)
  • Convert a miniature and show WIP pics
  • Finish a member of the Nextwave team
  • Average at least a miniature a week by the end of the year (so, paint 52 miniatures)
  • End the year with the Tally in the positive!


Oddly, I found myself becoming less and less enthusiastic with this sculpt as I was painting it. Especially when working with oddities like sculpted bulging eyeballs:


Nuts, the splotch of spilled wash on his hand is super obvious. Ah, Raiders in Fallout are generally filthy dirty, I'm fine with leaving it there.

Tally

2 vs 0 = +2

There are two more miniatures currently half painted on my desk (as I cleared away a lot of the accumulated bits and bobs that had accrued over the year), so I think I'll see about finishing and posting them before clearing away my paints and making space for other projects. Or potentially getting around to painting the scenery that I built back in... June?

Monday, 1 January 2018

Ringing in the New Year...

So, it looks like much like the Tally, my ability to come up with punny blog post titles also resets with the changing of the year!

Thus, I present for your delectation a bell golem:


An old Dreamblade sculpt that I've had tucked away for years awaiting the right moment to hack off of his base and repaint. I fell in love with the ridiculousness of this sculpt the second I opened it - I firmly subscribe to the idea that wizards are dumb and nonsensical. Not the idea of wizards, I hastly clarify, but wizards individually - this is why they think things like 'hey, I can use magic to cross an owl with a bear and that's definitely a good idea' or 'why don't I enchant a golem that as an alarm system will smash itself in the face with a mallet to alert me to intruders. I am truly the greatest thinker of my generation'. Amazing.


The original paint job on the miniature was pretty much monocoloured, so for a little more visual interest when I repainted him I gave him a wooden haft on his hammer, and painted some of what I assume were originally intended to be rivets on his hammer as jewels. Plus, some weathering, and carefully picking out the very shallow detail on his face, and we avoid having a totally bland finished figure.


Here he is with Conan for scale. Conan is presumably jealous that this random monster got flock and static grass whilst he straddles bare rock.

Tally

1 vs 0 = +1 

Ah, it begins so strongly...